Creating a professional website is one of the most powerful things you can do to grow your business, attract clients, or promote your brand. In this beginner-friendly guide, we’ll walk you step-by-step through how to create a WordPress website — the world’s most popular website platform.
Whether you’re creating a site for your own product, a client, or an online store, this guide will help you design a website that looks professional, functions smoothly, and supports your marketing strategy.
Why Your Business Needs a Website
Your website is the digital home of your brand — the place where people connect with your story, explore your products, and take action. Unlike social media platforms, where algorithms control visibility, your website gives you full control over how people experience your brand.
Major companies like Apple, Nike, and Sony use their websites as their primary sales channels. By building your own website, you create a dedicated online space to showcase your products, services, and story without distractions.
Step 1: Choose a Web Host ( Bluehost, Namecheap, Hostinger, GoDaddy, etc.) To Create a wordpress website
To make your website accessible online, you’ll need a web host — a service that stores your website files and keeps them available 24/7.
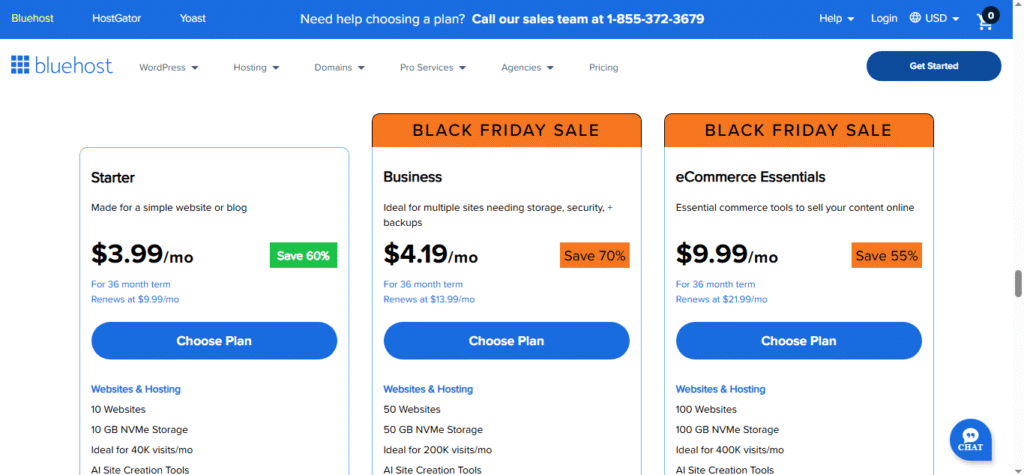
For beginners, Bluehost is one of the best choices. It’s beginner-friendly, affordable, and officially recommended by WordPress.org. Bluehost offers a one-click WordPress installation, free domain registration, and excellent customer support.
To create a wordpress website
search for bluehost.com
- Click Get Started.
- Choose the Basic Plan — perfect for small businesses and first-time website owners.
- Enter your domain name — your web address (e.g., hawclick.com)
Step 2: Choose and Register Your Domain Name
Your domain name is your website’s identity. It should:
- Clearly represent your brand or product.
- Be short and easy to remember.
- Reflect what your website offers.
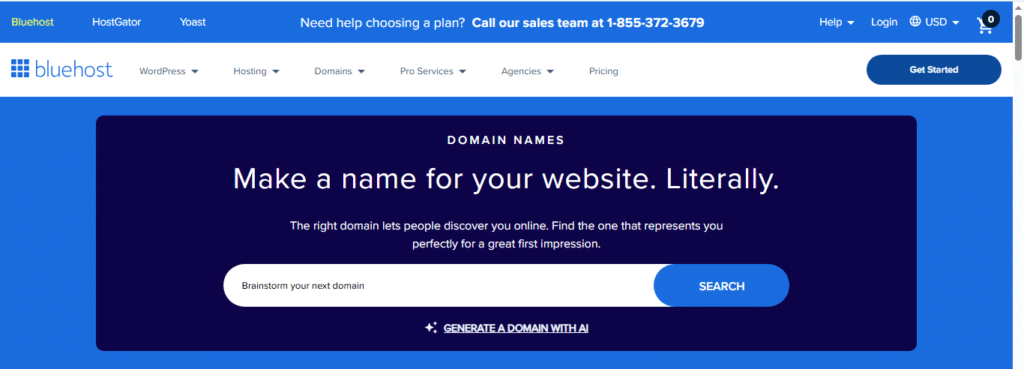
If you’re unsure what to choose, you can use ChatGPT or domain name generators to brainstorm creative ideas.
Example prompt for ChatGPT:
“I’m creating a website for an affordable Fashion lifestyle. Suggest 10 professional three-word domain names.”
Once you find one you like and it’s available, register it directly through Bluehost.
Step 3: Install WordPress
To create a wordpress website
After setting up your hosting and domain, it’s time to install WordPress. Bluehost makes this incredibly easy:
- Log in to your Bluehost account.
- Click Install WordPress.
- Follow the on-screen setup steps.
Once installed, you’ll be able to access your site’s admin dashboard at:
yourdomain.com/wp-admin. this is the right step to create a website using wordpress
Log in using the username and password you created during setup.
Step 4: Install a WordPress Theme
Your theme controls how your website looks — the layout, fonts, colors, and design structure.
Here’s how to install a theme:
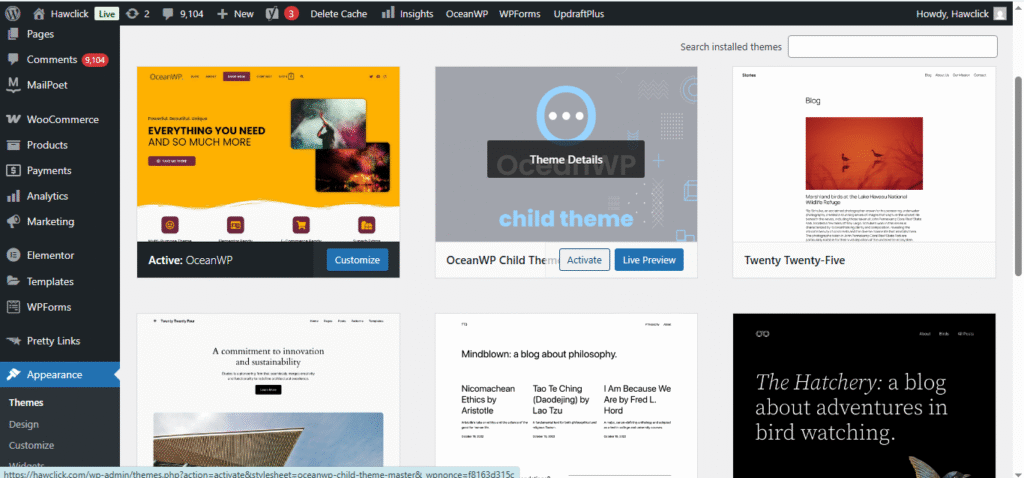
- From your WordPress dashboard, go to Appearance → Themes → Add New.
- Search for any theme eg, Sdyney, Oceanwp, Astra etc (a professional and flexible free theme).
- Click Install → Activate.
WordPress themes help you control the overall design and style of your website without changing the underlying content.
For example, let‘s say you publish a few blog posts and then decide you want to change your theme. After changing your theme, all of those blog posts will still be there. They’ll just be styled differently according to the rules of your new WordPress theme.
When you first install the WordPress software, WordPress automatically applies a default theme that looks rather plain. Instead of using that default theme, I recommend installing a new WordPress theme that matches your preferred design aesthetic.
Choose your WordPress theme.
You can find thousands of free or paid themes, so you’re almost certain to find a design that you like in order to create a wordpress website
In the past, it was common to find very niche-specific WordPress themes. For example, one WordPress theme for “restaurant websites” and a different WordPress theme for “plumbing businesses.”
However, nowadays, the most popular approach with developers is to just offer one flexible base theme and then lots of importable starter sites. In my experience, this is the best way to go when choosing your themes.
Personally, I think that choosing a lightweight multipurpose theme like Astra, Kadence Theme, or GeneratePress is a great place to start. I personally use GeneratePress on most of my websites, if you’re wondering.
All of these themes are multipurpose (which means you can use them for any type of site) and include dozens or hundreds of importable “starter sites.” This basically means that you can import a starter site design with just a few clicks and then instantly have a beautiful website.
Install your WordPress theme.
Once you choose the WordPress theme that you want to use, here’s how to install it:
- Open your WordPress dashboard.
- Go to Appearance → Themes.
- Click the Add New Theme button at the top.
If it‘s a free theme at WordPress.org, you can install it by searching for it. If it’s a premium theme that you purchased directly from a developer, you’ll need to upload the .zip file for your theme.
Customize your WordPress theme.
Once you find the perfect theme, you can install it to begin customizing. Each theme has different steps required during the customization process, so be sure to follow them closely.
Generally, you can customize most WordPress themes by going to Appearance → Customize. This will open the WordPress Customizer, which lets you easily make changes using preset options and a real-time preview of your site.
If you choose one of the newer “Full-Site Editing” themes, you can customize it by going to Appearance, then Editor.
For more details, we have a whole post on how to customize a WordPress theme. You can also consult your theme developer’s documentation for instructions that are specific to your chosen theme.
Once it loads, your website will automatically have pages like Home, About, Shop, and Blog — ready to customize.
Step by step guide to create a website using wordpress.
Step 5: Set Your Website Title and Logo
Your logo and site title are key elements of your brand identity. They help people recognize your business instantly.
To set them up:
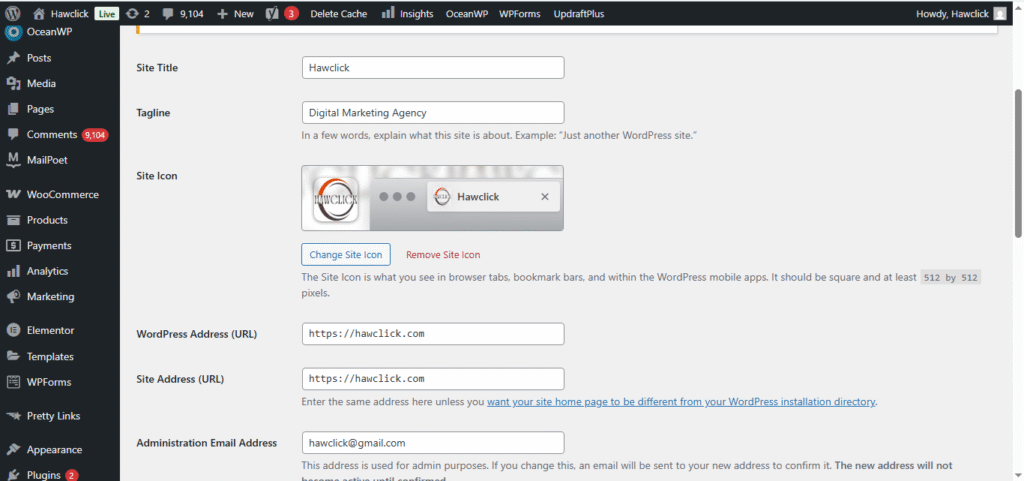
- Go to Appearance → Customize → Header → Site Identity.
- Enter your Site Title (e.g., affordable fashion lifestyle).
- Add a Tagline — a short phrase that summarizes your brand (e.g., “make fashion a lifestyle”).
- Upload your Logo and Favicon (the small icon seen in browser tabs).
✅ SEO Tip: Always fill in your site title and tagline, even if you’re using a logo. It helps Google understand what your website is about.
If you don’t have a logo yet, you can use the Shopify Logo Maker to create one for free.
Step 6: Create and Organize Your Website Pages
Your website pages make up the main structure of your site. Go to Pages → All Pages to manage them.
Common essential pages include:
- Home – Your main landing page.
- About – Share your brand story and mission.
- Shop – Showcase your products or services.
- Explore – Blog or resource section for articles.
- Cart / Checkout / My Account – If you’re selling products.
- Privacy Policy and Terms – Legal pages required for compliance.
Add posts and pages to your website.
When you add content to your WordPress website, it’s usually displayed in the form of posts and pages:
- Posts — Use these when you want to create blog posts or other similar content. New posts will automatically appear at the top of your blog listing page, and each post will have its own public publish date.
- Pages — These are better for static content that doesn’t have a publish date. For example, your “About” page, “Contact” page, and so on. There‘s no default page that lists all of your “Pages,” but you can add links to them using your site’s navigation menu or other areas.
To add a post to your website, go to the admin dashboard, click Posts, and then Add New Post.
To add text, you can just click in the editor and start typing. For other elements — e.g., images or buttons —
When you’re finished, click Save Draft to save your changes as a draft, or click Publish to immediately take the post live.
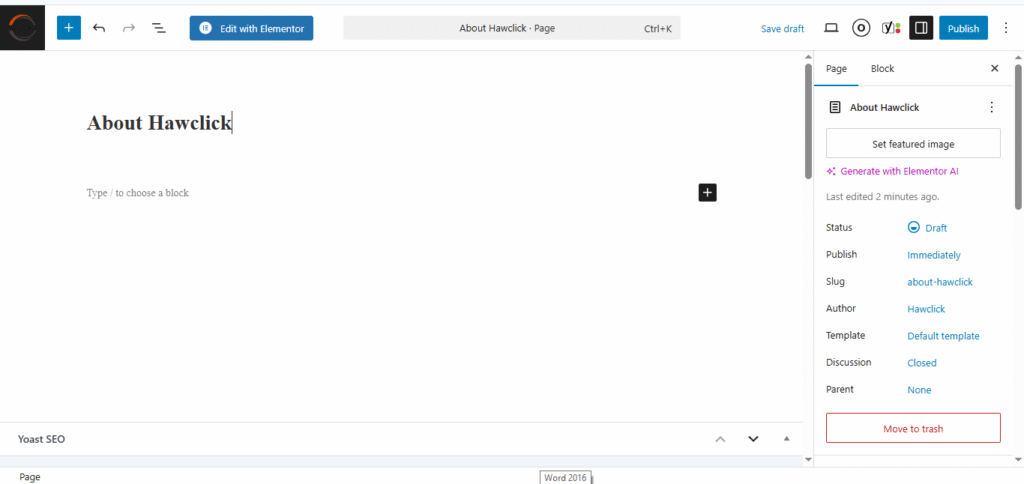
Adding a page to your website is a similar process. In your admin area, click Pages, then Add New Page.
You can then add content using the block editor and Publish it when you’re finished.. These are essential steps to enable you create your wordpress website
Add Legal Pages (Privacy Policy, Terms & Refunds)
Every professional website needs legal pages to stay compliant and transparent with users.
Use a Privacy Policy Generator and Terms & Conditions Generator to create these pages easily.
- Add them as new pages in WordPress.
- Paste the generated text.
- Update your company name, date, and links (like smartflowbottle.com/privacy).
Step 7: Customize your website
Beyond the theme you choose, there are a number of ways to create your wordpress webite. I think that now is a good time to review a few options.
First, you can customize your site title. From your admin dashboard, select Settings > General. Here, add your website title and tagline. You can also toggle other basic site information like your URL, email, time zone, and more.
Next, go to Settings > Reading. This is the area where you can change the homepage of your website, which is something that I recommend doing.
By default, WordPress will display your latest blog posts on your site‘s homepage, which is a remnant of WordPress’s blogging roots. However, I think that most websites, even including blogs, will benefit from creating a static homepage instead.
That way, you can make sure that you’re putting your best foot forward when you introduce visitors to your website/brand.
You can create your homepage as I showed you above (Pages → Add New Page) and then assign it in this settings area.
If you still plan to have a blog, you can also create a new “Blog” page and assign it as your Posts page. That way, visitors will be able to see your latest blog posts by going to yoursite.com/blog.
Outside of the settings area, I also recommend customizing your WordPress site’s navigation menu, which can help your visitors to easily find information on your website.
Here’s how to add or edit a navigation menu:
- Go to the Appearance tab in your WordPress dashboard.
- Select the Menus option.
- Edit the existing menu that comes with your theme or create a new one.
If you‘re using a new “Full-Site Editing” theme, you’ll go to Appearance and then Editor instead. However, most popular WordPress themes still use the Menus interface.
From here, you can determine how you want your navigation menu to look, how many pages you want to include, what you want to title those pages, and what order you want them to be listed in.
The exact design of your navigation menu will depend on your WordPress theme.
How to Launch a WordPress Website
Learn how to launch a website on WordPress with this step-by-step guide and checklist. Learn how to…
- Set up your domain name.
- Install an SSL certificate.
- Analyze your content.
- Back up your site.
Step 8. Install WordPress plugins to add new features.
WordPress plugins are add-ons to the core WordPress software that let you add new functionality to your site. This could be frontend functionality to create a better experience for your visitors or add new features to your site. Or, it could be backend functionality to help you more efficiently manage your website and business.
You can use plugins for small features (such as adding a contact form) or big features (such as turning your site into a fully functioning online store or online course).
With over 59,000 free plugins in the WordPress.org directory (and thousands more free and premium plugins at other locations), there are options for almost every type of website and user.
Pretty much every single WordPress site will need plugins. This is because the core WordPress software assumes that you‘ll use plugins to add certain features. For example, if you want to implement search engine optimization best practices, you’ll need a WordPress SEO plugin to help you do that.
To install a new plugin, click on the Plugins menu in the sidebar of your WordPress dashboard. This shows you all the plugins currently installed on your site.
Depending on your host, you might have several plugins installed already. Note that for a plugin to work, you must activate it after installing
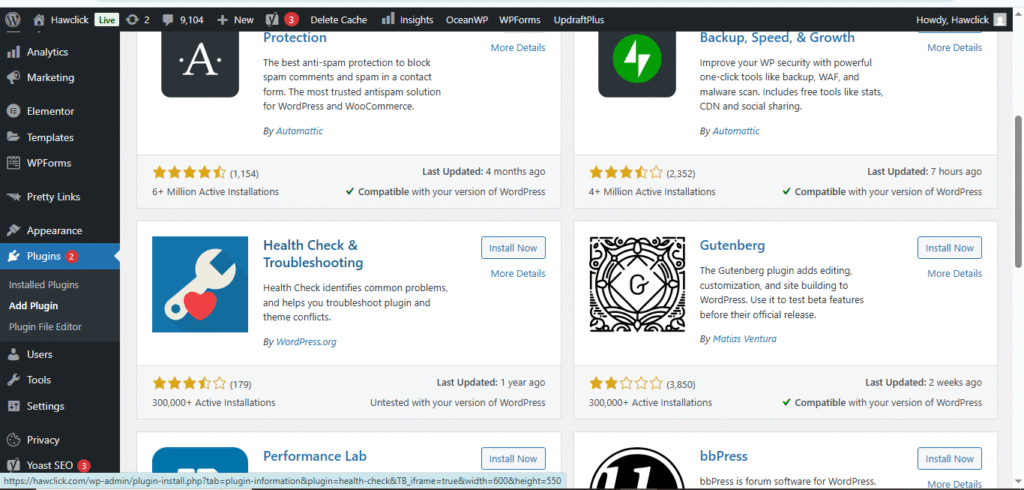
Here’s how to add a new plugin that you found in the WordPress.org plugin directory:
- Click the Add New Plugin button (or go to Plugins → Add New Plugin).
- Search for your desired plugin.
- Click the Install Now button for the plugin that you want to install.
- Once the installation process finishes (it should only take a few seconds), the Install Now button should change to Activate. Click the Activate button to make the plugin live on your si
8. Optimize your website to increase page speed.
Website performance is a critical part of the user experience. If your site takes too long to load, visitors won’t enjoy using it and might even just give up on your site and go somewhere else.
One of the best ways to make sure your site loads quickly is to choose quality WordPress hosting. In general, you get what you pay for, and cheap hosting usually won’t offer the same performance level as more premium hosting (especially for high-traffic sites).
However, there are still a number of strategies that you can implement on any host to make your site load faster. Here are some of the most notable performance optimization strategies to consider based on my experience speeding up dozens of WordPress websites:
- Page caching. This makes your website a lot more efficient by making it so that your hosting server doesn‘t need to dynamically “build” the WordPress page for each visit. In my experience, most hosts nowadays offer built-in page caching features. If your host doesn’t, you can easily add it using one of the many WordPress caching plugins.
- Optimize code. There are lots of strategies to optimize your site’s code and how it loads, including deferring render-blocking JavaScript, delaying JavaScript execution, removing unused CSS, and minifying your code. The easiest way to implement all of these strategies is to use a WordPress performance optimization plugin.
- Optimize images. Optimizing images will reduce their file sizes by compressing them, changing the resolution, and optimizing how they load. You can use an image optimization plugin to do this automatically for images that you upload to WordPress. My personal favorite is ShortPixel.